Category Archives: Coconut Oil

Hemp “Nutella”

Nutella is a brand name of a popular hazelnut chocolate spread. This recipe is a great way to either take a break from hazelnuts, or have a nut-free version. Adjust this recipe as to sweetness and thickness by adding more or less sweetener or hemp seeds to thin or thicken as desired.

  • 1/2 Cup of Hemp Seeds
  • 2-3 tbsp of Sweetener (Maple Syrup, Honey, or Coconut Sugar)
  • 2-3 tbsp of Cocoa Powder
  • 1/4 Cup of Coconut Oil or Melted Butter

Blend in a butter style blender. Taste. Adjust accordingly. Place in fridge in an air tight container.

Breakfast Cookie

This can be rolled, shaped, or even baked as bars.

INGREDIENTS:

  • 1/3 cup hemp seeds.
  • 1/2 cup shredded coconut (unsweetened)
  • 3 eggs (for egg-free use 3 TBSP arrowroot in 9 TBSP water)
  • 1/4 cup coconut flour
  • 1/4 cup coconut oil (melted, cooled)
  • 2 tsp pumpkin pie spice
  • dash of salt
  • 1/4 brown sugar substitute
  • 1/3 cup add in (options include chopped nuts, such as walnuts or macadamia; chopped chocolate chunks, crainraisins, raisins, chopped fruit)

METHOD:

  1. Preheat oven to 350.
  2. Line a baking sheet. Set it aside.
  3. Mix together coconut oil and eggs.
  4. Add dry ingredients. Mix well. Allow dough to rest 10 minutes.
  5. Shape into cookie shapes. Makes 12-14 cookies.
  6. Bake for 15 minutes.

I have made this recipe several times with lots of different options. The only note I would make is if you make a stir-in optional choice which is more dry, or your coconut ingredients are more dry than other times, you may need to add a dash of coconut milk or water before shaping your cookies. If you make them as bars, it is so much quicker, but then you have to play around a bit with the time to bake them.

Granola Bars (Hemp Seeds)

Want a simple, yet satisfying snack or grab-and-go breakfast idea? Then here is the recipe for you.

INGREDIENTS:

  • 1 Cup Hemp Seeds
  • 1 Cup Pumpkin Seeds
  • 2 TBSP Chia Seeds (if the texture of chia bothers you, consider grinding these in a coffee or spice grinder)
  • 1 Cup Unsweetened Coconut Flakes
  • 4 TBSP Coconut Oil (or butter)
  • 1 Cup Sunflower Seed Butter (or other nut or seed butter)
  • 1 Cup Walnuts (or any combination of nuts equaling one cup measurement)
  • 8 Packs Sweetleaf Stevia
  • 1 tsp cinnamon

METHOD:

  1. In a bowl, mix together all ingredients. Blend together well.
  2. Press mixture evenly into an 8×8 silicone pan or a lined with parchment paper pan.
  3. Place in freezer.
  4. Once frozen, take bars out of the freezer. Remove the granola block from the silicone pan. Cut in half, forming two portions. Continue cutting each portion in half to form 16 granola bars of equal size.

NOTES:

  • You can eat these straight out of the freezer. They do not freeze “hard” so they are eatable. I wouldn’t even bother keeping them in the fridge. Simple package them into an air tight container and store them, well labeled, in the freezer.
  • There is a LOT of flexibility in this recipe. Potential add ins can switch up the flavor (and the carb count). Try some different combinations. Some things to try: Pistachio nut-butter; macadamia nuts with cranraisins; walnuts with raisins; a stir in of chopped dark chocolate or coating the outside with melted chocolate along one edge.

Flat Bread (Dairy Free, Gluten Free, Grain Free)

This versatile side dish is worthy of eating on its own, as the base to scoop up your favorite gravy or jam, to make a sandwich, or any other naan-bread like use you can think of! It can be made unleavened without sacrificing its texture or flavor, simply by leaving out the “baking powder” or using a baking powder replacement. There are a number of tested options for oil too–ranging from coconut oil, ghee, olive oil, melted butter, or even a veggie or fruit puree. All work well! Give it a try.

YIELD: 6 Flatbread pieces per batch
This recipe takes some time to make, but is worth it. Even if you plan on making more than 6 flatbread pieces, make them one batch of dough at a time.

INGREDIENTS:

  • 2/3 Cup Coconut Flour (I used HEB Organics)
  • 2 TBS psyllium husk powder
  • Optional: 1 tsp Baking Powder
  • 2 TBS Olive Oil (or use one of the following instead of the olive oil: Ghee, coconut oil, melted butter or a puree)
  • 1/4 tsp salt
  • About 1 Cup Boiling Water

METHOD:

this recipe, once the dough is formed and rested, is very much like making “pancakes” –> you will be cooking the dough rolled or patted as thinly as you desire until it is cooked, then flipping it and cooking it on the other side too

  1. Begin by assembling your ingredients.
  2. Mix together the dry ingredients first.
  3. Mix in the oil to incorporate, then slowly add the boiling water. Depending on the brand, and freshness of your coconut flour this may take more or less than 1 cup of water to form the dough. Mix until  dough forms. (The texture is very much like “mashed potatoes”)
  4. Allow the dough to rest 10 minutes, or until cool enough to handle. The dough needs this resting period to hold together, since it is not made with gluten.
  5. Divide the dough evenly into 6 dough balls.
  6. Roll the dough balls out, one at time, or pat with your hands, depending on the desired thickness.
  7. Cook the bread, dry style, in a heated cast iron pan or griddle. Allow the first side to fully cook, before flipping to cook the second side.

    OPTIONAL: Have melted butter (or other oil) available if desired to which you can add garlic, parsley, or other spices. Brush surface of bread with this herb oil (or serve with dipping sauce) after it is finished cooking and just before serving.

TIPS:
– Other toppings include the option to have no topping, just enjoy the bread as it is, cinnamon stevia, green onions, jam, preservatives, lunch meat, cheese spread, fish spread (such as tuna or salmon salad), parsley, garlic salt, sesame seeds (with or without the oil being toasted sesame oil) or just about any other topping you can think of.
– NOTE: This bread gets more and more MOIST after the first day. It works best to make a batch and use it up, rather than having it sit around too long.
– Depending on the thickness, you can roll this as thin as a tortilla, although those are hard to turn, or patting them to a thickness like old-fashioned potato pancakes and they taste a bit like them, texture wise, too. The potato cake, or veggie nuggets, style makes a nice side dish.

Another recipe I’m going to try too, which is similar but uses a few different ingredients is: https://myheartbeets.com/coconut-flour-naan/

Shortcake (Coconut Flour)

This recipe is grain-free, low carb, can be made sugar free, quick and easy to whip up and is delicious! Eat it plain, as is, or served with your favorite berries or berry sauce atop, with or without whipped cream. Another serving suggestion is with chocolate sauce and whipped cream. Enjoy!

INGREDIENTS:

  • 1/4 Cup coconut flour
  • 3 TBSP melted butter, coconut oil, or other neutral oil
  • 1/3 Cup JUST eggs vegan liquid egg replacement
  • 3 TBSP sweetener (or about 6 stevia packs)
  • 1/4 tsp rum
  • 1/4 tsp cinnamon powder
  • 1/4 tsp salt
  • 1/4 tsp baking powder

METHOD:

  1. Turn on your toaster oven (If using) to 400 degrees.
  2. Meanwhile prepare a 6 muffin tin with muffin liners (or grease with butter, coconut oil, or other neutral-flavored oil)
  3. Begin by mixing together in a bowl all of the dry ingredients. Make sure the mixture is well combined and none of the dry ingredients have lumps.
  4. Stir in the melted butter or oil, as well as the liquid JUSTeggs brand egg replacement.
  5. Mix well to combine.
  6. Drop by heaping TBSP into prepared muffin tins. Distribute batter evenly between 6 muffin tins. Batter rises, but it doesn’t spread much, so spread it out evenly in the muffin tin before baking.
  7. Bake until golden about 10-15 minutes depending on your toaster oven.

Various Serving Suggestions:

  • This recipe yields 6 small shortbread portions. Those individual portions can be slit in half to stuff with , or top with, fruit of choice and cool whip/whipped cream. It makes a nice snack or dessert.
  • Leave out the rum, cinnamon powder and sweetener; use olive oil in place of butter or coconut oil for a savory flavor. Pairs nicely with garlic or Italian seasonings.
  • For portion control, you could bake for a shorter time, 12 mini muffins instead of 6 regular muffins.
  • As is, this recipe tastes great as a short cake (with any fruit/juice and whipped cream).
  • Top with cream cheese.
  • Other topping ideas, besides fruit include just using whipped cream. And/or adding chocolate bits. Walmart carries a sugar free brand of chocolate bits. Or, you can make your own.
  • Taste great at room temperature with some butter on it.
  • Try it with sugar-free jelly or jam.
  • This recipe is surprisingly quick and easy to make, with very little clean up. You can make it frequently.

Source: For this recipe, I looked at high carb recipes, gluten free recipes, and other online recipes which were similar to this one. Then I made up a hybrid type recipe without any of the allergens the folks I’m cooking for avoid.

Carrot-Pecan Cake (lower carb)

Delicious, moist, amazing treat! This recipe has special-occasion worthy written all over it!

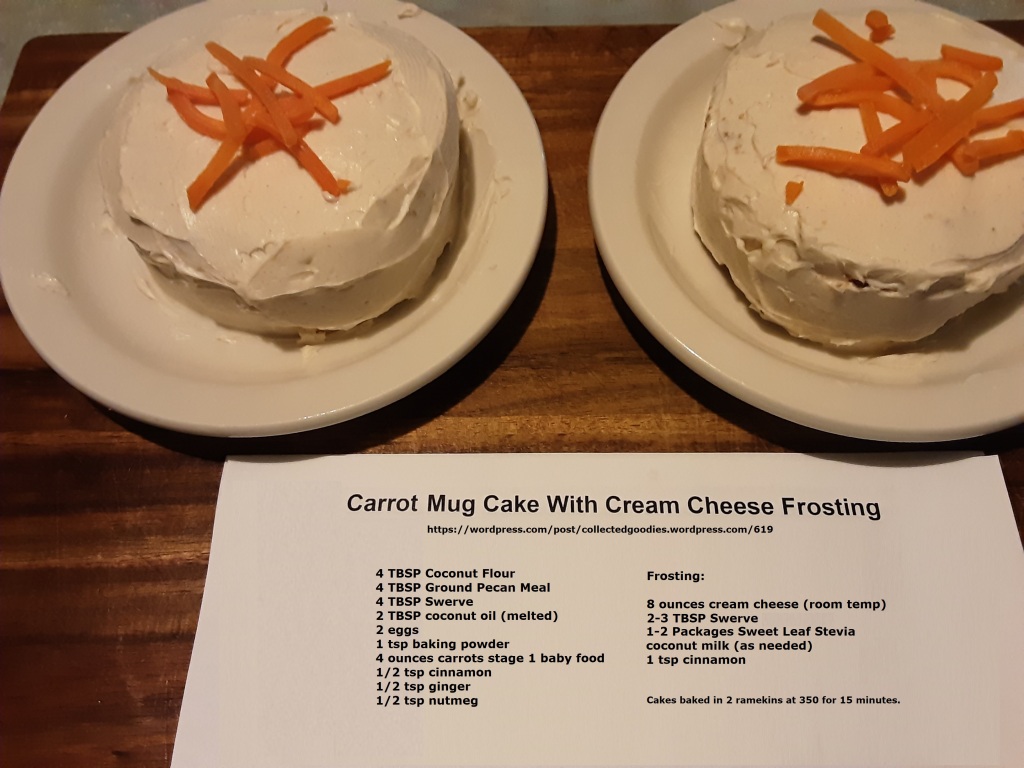
Photo of two frosted carrot cakes, ramekin sized, with a copy of the basic recipe ingredients and a link to this recipe.

So often, recipes like this use a microwave and/or almond flour. If you’ve been searching for a worthy carrot cake recipe made without almond flour and without using a microwave, then this is the one for you! If you like your carrot cake with some nutty crunch, try blending our own pecan meal, leaving some of the pecan pieces a bit more chunky while grinding the remainder to “flour” like consistency.

To make this coconut-flour rich cake turn out moist, this recipe uses baby food. Why? It is the perfect consistency for ensuring a moist and delicious cake, and it is also sized perfectly for this recipe ensuring no wasted excess carrots. Be certain to purchase stage 1 baby food as it only has one ingredient; in our use case here that is simply pureed carrots.

INGREDIENTS:

Cake Batter:

  • 4 TBSP Coconut Flour
  • 4 TBSP Ground Pecans (see note)
  • 4 TBSP Swerve Powdered
  • 2 TBSP coconut oil (melted)
  • 2 eggs
  • 1 tsp baking powder
  • 4 ounces carrots stage 1 baby food (no added ingredients, just pureed carrots)
  • 1/2 tsp cinnamon
  • 1/2 tsp ginger
  • 1/2 tsp nutmeg

Cream Cheese Frosting:

  • 8 ounce package full-fat cream cheese (room temp)
  • 2-3 TBSP Swerve Powdered (to taste)
  • 1-2 Packages Sweet Leaf Stevia
  • coconut milk (as needed)
  • 1 tsp cinnamon
  • shredded carrot for topping or candles (optional)
  • one flavoring: vanilla, orange, lemon, maple (optional)

METHOD:

  • Grease two ramekins with coconut oil.
  • Mix together dry batter ingredients in one bowl. Stir until well blended and there are no lumps.
  • In another bowl, mix together the wet ingredients until well blended together.
  • Combine wet ingredients into dry ingredients.
  • Equally distribute into prepared ramekins.
  • Bake in a 350 degree toaster oven for 12-15 minutes. Don’t over cook or the cake will be too dry.
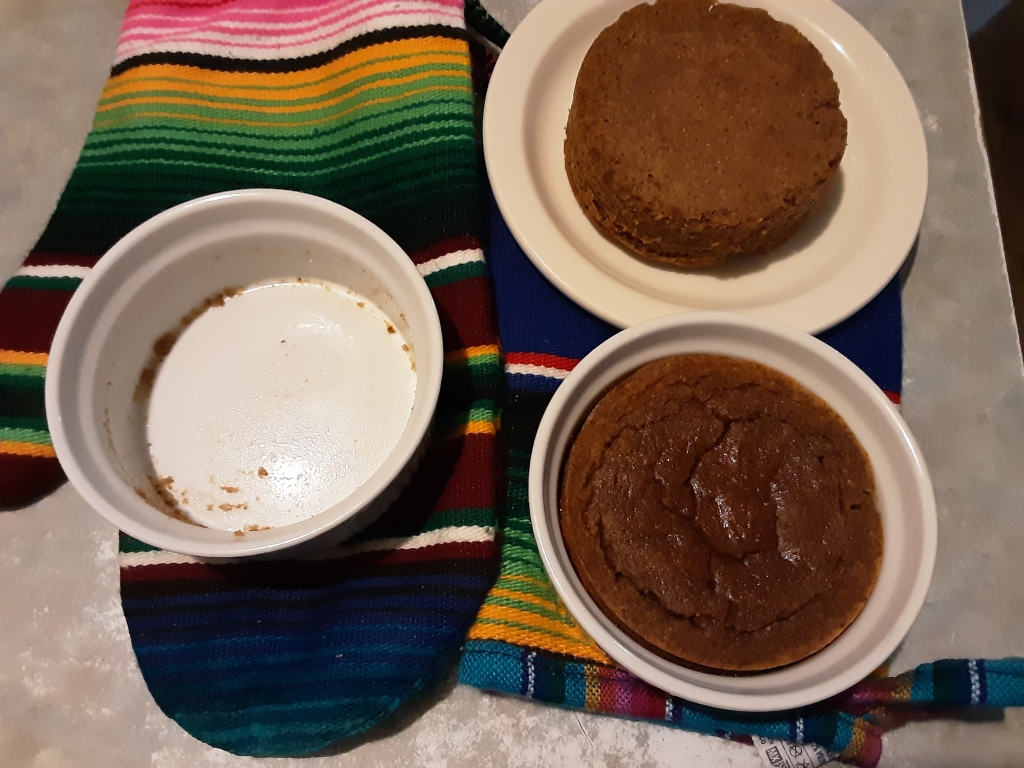
  • If you will be frosting these for a “birthday” or layer cake, you’ll need to unplate them. Otherwise, you can skip this step. To unplate, begin with one, then follow the steps for the second ramekin. Use a snack plate the size of your ramekin or slightly larger. Using hotmits (the ramekins are still hot!) place the snack plates over the top of the hot ramekin. Flip the ramekin covered with your snack plate upside down so that the plate is on the counter and your ramekin is upside down over the plate. Tap the bottom of the ramekin. Carefully lift up the ramekin so the cake is now on the plate. Repeat this process for the other ramekin.
  • Allow cake to fully cool.
  • Place in freezer for15-30 minutes (this helps us frost the cakes as they are very soft and moist!
  • While the cakes are freezing to frost, it is time to start making your frosting. NOTE: You can make a 2 layer cake out of each Ramekin or a 4 layer cake out of both. You’ll need to time this perfectly. Freeze just long enough to have the cakes firm enough to use your cake cutter to make the layers, before frosting.
  • Whip together the room-temperature cream cheese package, your sweetener, your pinch or two (to taste) of cinnamon, and if desired a flavoring such as vanilla or other extract (maple, orange, lemon all interesting frosting flavors, but this cake is so moist and delicious you don’t need any of the optional flavors. Just use coconut milk to thin, if needed, to get the frosting consistency.
  • Taste before frosting to ensure your frosting is sweet enough for you.
  • Remove cake from freezer.
  • Carefully frost.
  • Top with candles or carrot shards, if desired (optional)
  • Enjoy!

NOTES:

  • Carrot cake always takes a bit more time than other cakes to make. Using pureed, stage, one, carrot baby food saves time. Frugal tip: make your own pureed carrots and freeze them in 4 ounce portions to use later in making this recipe when ever you need it.
  • This frosting is so delicious and versatile with the optional flavorings you can really enjoy this on its own, or atop other recipes besides this carrot cake. There are lots of Vitality oils which could be used as a topping flavor too: Lemon, Orange, Tangerine, Lime, Grapefruit, Ginger, Spearmint, Mint. Citrus Fresh, Clove, Cinnamon Bark, Cardamom, Bergamont, Lemongrass, Lavender.
  • If you are not using this recipe for a special occasion, you can reduce the frosting in half to simply top the top of the two ramekin cakes in the ramekin and enjoy right away without freezing or any additional steps.
  • Swerve Powdered Sugar style works best for this recipe. If you only have granular sweetener, grind it in your coffee grinder.
  • To make the pecan meal, grind fresh pecans in a coffee grinder to a “flour” like consistency, stopping just short of making pecan butter.
  • Another optional topping could be coconut flakes (dyed with food coloring or not)
These cakes unplate easily, are super moist, delicious, spiced just right, and easy to frost once soft-frozen a few minutes.

Happy birthday!

Coconut Waffles

This recipe was cooked in a Churrwaffle 4-mini waffle maker using 1/8 cup of batter and coconut oil for greasing the waffle maker. Resulting waffles can be enjoyed as is, toasted, or frozen and thawed.

INGREDIENTS:

  • 8 oz cream cheese (vegan: use cashew cream )
  • 8 eggs (vegan: use “just eggs” liquid )
  • 8 TBSP coconut flour
  • 2 tsp baking powder
    • 2 TBSP melted butter (vegan option: use coconut oil)
  • 2 TBSP Sweetener of choice

DIRECTIONS:

  1. Preheat waffle iron .
  2. Combine eggs, cream cheese, and melted butter. Mix well.
  3. Add remaining ingredients to mixture and stir to combined.
  4. Grease heated waffle iron with fat of choice (I used coconut oil)
  5. Add 1/8 cup batter to heated waffle iron per well.
  6. Cook until done to your preference.
  7. Repeat with remaining dough.

TIPS:

  • This recipe makes 24 mini waffles.
  • To use this as bread, omit sweetener.
  • Optional add ins include: Vanilla Extract (1 tsp), cocoa powder (1-2 TBSP); or mini chocolate bits or cocoa nibs. (I made mine without any of these optional ingredients)

FREEZING:

These waffles freeze and thaw well. It doesn’t change their texture too much and make them a great allergen-free convenience food substitute.

To freeze, be sure to cool waffles fully before preparing to freeze or you will have unpleasant ice crystals. If you don’t allow them to fully cool, you will have a lot of condensation which will ruin the texture of these when they thaw. I labeled and then lined a gallon zip lock with a row of waffles, parchment paper, another row of waffles. I then “burped” all the air out of the zip lock and froze them flat. Generally, when I want a frozen item to stay flat, i freeze it atop a tray; later, I remove the tray from the freezer once the item is fully frozen and will keep its shape.

When removing the waffles later to use, this method insures you can remove the exact portion you want. It takes less than 5 minutes, from frozen to eating them, to thaw these in a toaster oven. It takes about 20-30 minutes on the counter top to fully thaw. Perfect if you’re fixing something and want to consume these when finished such as: cooking, showering, doing the laundry, preparing lunch, or doing the dishes, and so on.

TOPPINGS:

  • Enjoy 2 of these as a “bun” for sandwich, breakfast sandwich, grilled cheese, making french toast, a cheese burger, or other sandwich type of snack or meal.
  • Enjoy one or more as is, spread with butter, honey, jam, jelly, or any fruit or nut butter.

My favorite topping is my faux apple butter.