Category Archives: Coconut

Oreo-Like Ice Cream

Quick, easy, tasty-treat, and dairy free. Depending on your choices, this can be low carb, vegan, low sugar, or it can be honey/maple syrup or any other sweeteners.

Churning, loveliness!

INGREDIENTS:

  • 2 Cans Organic Coconut Milk
  • 1/2 cup boiling water
  • 1/2 cup BLACK cocoa
  • 1/2 cup maple syrup (if substituting for another sweetener use powdered sweetener such as swerve powdered or walden farms sugar-free maple walnut syrup)
  • 1.5 tsp cream de cocoa liquor
  • 8 mini scoops Kal Stevia powder (pure stevia–not their version with maltodextrin mixed in)

INSTRUCTIONS:

  • This is a trick my 1890’s born grand mum taught me: when making anything chocolate, start with boiling water! It does something amazing. This recipe is no exception. Begin with 1/2 cup of boiling water.
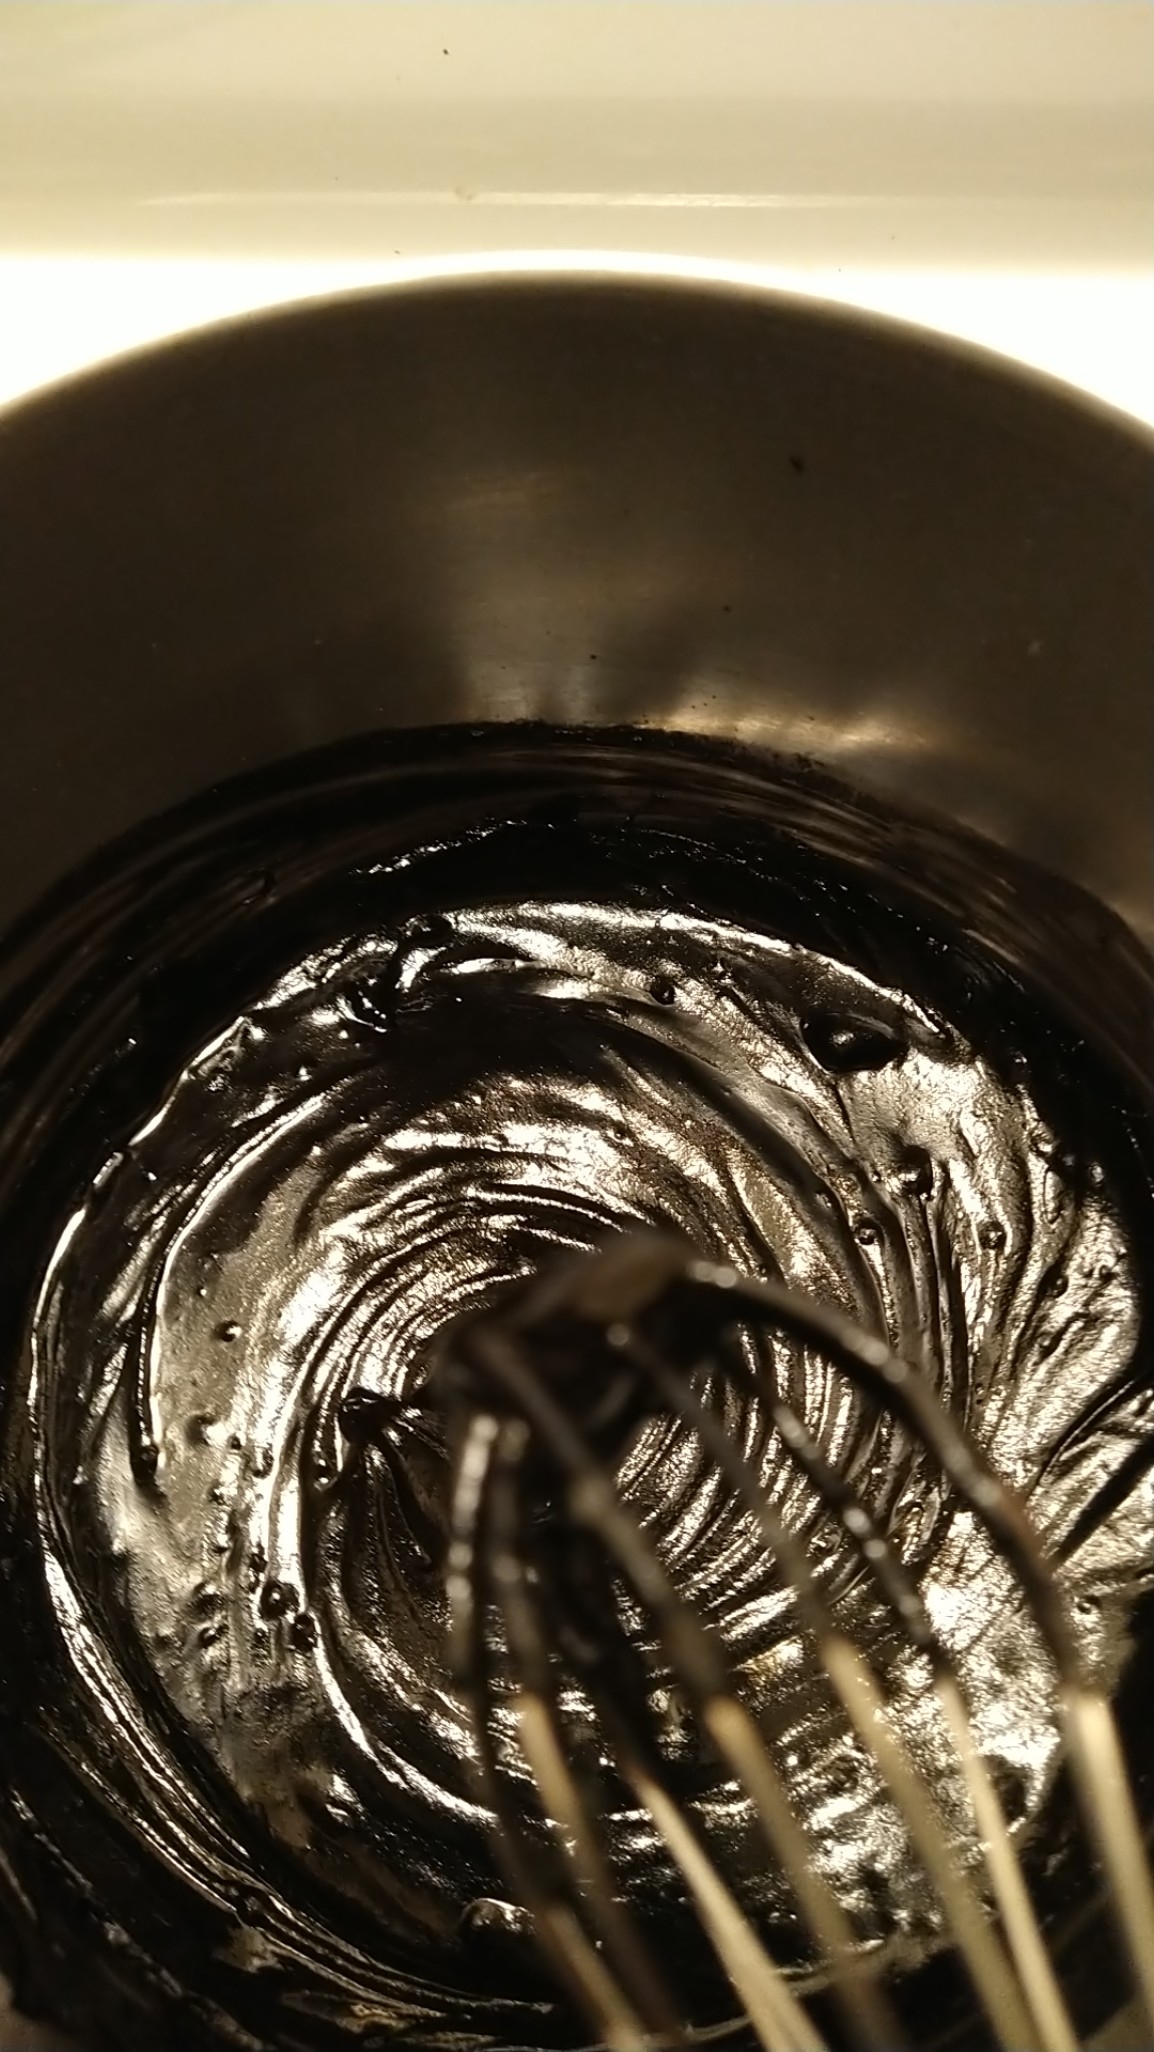
  • Once the water boils, place into it your 1/2 cup of BLACK cocoa powder. It will be nice if you use another kind of cocoa but it won’t be “oreo” flavoring.
  • Mix till a beautiful and fragrant chocolate emerges. Based on the smell, you may be tempted to taste it, at this stage; however, be aware it is dark chocolate with no sweetener despite how it looks and despite how it smells. Be forewarned! 🙂
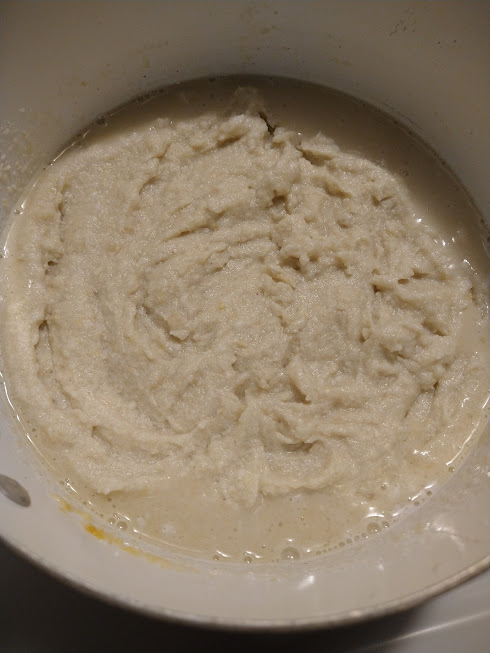
  • Now stir in all of the coconut milk including the fat. Mix well. (Optional: reserve a tiny amount of the coconut cream until the end–mix that in at the very end for a “cookies and cream” style swirl.)
  • Mix in the sweetener of choice and the cream de cocoa. This helps the ice cream freeze, but not as solid as it does without it!
  • Taste the mixture. Adjust sweetener, if needed.
  • Pour this well mixed beautiful concoction into the prepared ice cream maker and follow the manufacturers directions for use.
  • OPTIONAL: last step when the ice cream is ready, stir in the reserved coconut cream, if desired for the oreo-cookie-and-cream style ice cream. This is optional.

STORAGE: Enjoy this right away, or store in the freezer. I suggest storing this in individual sized servings. I use some recycled glass bullion jars to have a serving size ready to enjoy as desired. It does take a moment or two of thawing before it is soft enough to eat.

Waffles (Freezer, Toaster Friendly)

This is a staple you can make up, one or more batches at a time, and have ready when you want a soy-free, dairy-free, nut-free, gluten-free, grain-free version of waffles ready to go. This freezes well and can go from freezer to toaster without any issue.

Last 4 in the batch–turned out as good at the first ones! Be sure to use a preheated, greased, mini waffle iron for this one.

INGREDIENTS:

  • 2 unripe plantains
  • 6 TBSP Coconut Milk (or just use water/olive oil if you cannot have coconut)
  • 1/2 tsp baking soda
  • 1/2 tsp salt
  • 1 TBSP white vinegar.

INSTRUCTIONS:

  1. Use a mini waffle iron. Begin by pre-heating it.
  2. Peel Plantain. Cut into small slices.
  3. Place plantains and coconut milk into a bullet blender.
  4. Blend until batter forms.
  5. Add remaining ingredients, blend to mix.
  6. Grease waffle iron.
  7. Drop batter, one heaping teaspoonful into pre-heated waffle cavity. Spread dough around. Seal. Cook for 5 minutes.
This recipe yields 12 mini waffles.

USE AND STORAGE:

Eat right away. Or allow to cool. These are very moist and steamy so you need to let them cool completely before storing them or you will have a lot of condensation from the steam cooling.

If you are going to freeze them, and they freeze lovely by the way, do so after they are cooled by placing them flat, in a single layer until frozen. Then package accordingly for your freezer.

Once frozen, you can thaw and enjoy; Or you can toast these successfully in a toaster. Just be aware, like coconut flour items, these turn very GREEN when toasted. It also makes it nice to realize when they are finished as the green hue gives away their heat status.

Toppings: Butter, plain, cinnamon and sweetener of choice, maple syrup, honey, or any other jab are all nice choices. Or try these with savory items like chili or other savory waffle toppings.

DINNER ROLLS (Sandwich Buns, Snack Pizza Rounds)

This recipe, depending upon how you shape it before baking (and adjust the baking time accordingly) works well for a number of “bread substitute” types of recipes or meal plans. You can use this, English muffin size, to make open-faced snack pizzas just as easily as you can eat it as it is, or turn it into the base of a breakfast sandwich with your favorite ingredients. I can be used for sloppy joe and/or biscuits with sausage and country gravy style of meal plans too. I’ve used it as a “burger bun” style of bread replacement when eating salmon burgers, turkey burgers, or beef burgers, as well as making a bun sandwich with it. It does okay, flavor wise, with either sweet (top with stevia sweetened cinnamon butter for example) or savory items. It freezes well. It tastes just fine by its self or with butter on it. (Try garlic bread, too–just remember it is soft and can easily crumble). I’ve not tried it yet for bread crumbs but I bet it could be crumbled and used as a base to make herb croutons, or a stuffing base with turkey broth onions celery and sage, and is basically a good go-to item to have on hand since it freezes so well. It can be made ahead and frozen. It thaws easily in the toaster oven in the amount of time it took me to make the meal I wanted to use it for. When I made “pizza” with it, I added it frozen to the baking tray, topped it with frozen sauce, and frozen homemade sausage, and the dairy-free cheese, and it worked well enough too.

INGREDIENTS:

  • 1/2 Cup HEB Unsweetened Coconut Yogurt
  • 1/2 Cup Coconut Flour
  • 1/2 Cup Boiling Water
  • 1 TBSP Psyllium Husk
  • 2 TBSP Golden Flaxseed Meal
  • 2 TBSP Melted Butter
  • 1 TBSP White Vinegar
  • 1 tsp baking powder
  • 1/2 tsp Real Salt
  • 1/4 tsp Arrowroot

INSTRUCTIONS:

You can find this recipe’s original author’s instructions to mix these and bake them here: Keto Vegetarian’s Recipe

I made modifications from the original recipe due to different allergens. One note is that the water should be boiling when it is used to activate the psyllium. Once mixed, the dough needs to rest for about 10 minutes. The oven should be preheated to 350 degrees. These are baked about 25 minutes (until golden on top). Turn off oven and let cool for 10 minutes before removing from the oven.

They do well: 1) frozen and thawed (I froze them flat on a tray, then transferred them to individually sealed bags with a piece of parchment paper between the split portion so as to be able to separate them before thawing more easily so i could thaw in the toaster oven. 2) can be used without any further work than making them. 3) do well from the fridge and being used.

They are too moist. Like many “coconut” based items these have a tendency to have a too moist texture. They do not hold up well to a burger and don’t toast firm enough, even in the toaster oven (but that’s better than not toasting them) to really not crumble when eating a juicy burger. I would suggest always using sandwich style lettuce in the bun if you are using them as a burger bun so it catches what ever you have inside (tuna salad, salmon beef or turkey burgers, chickpea/hummus spread, etc) when the bun eventually falls apart, as it likely will.

Recipes on this blog I recently used in combination with this dinner roll recipe to make various types of meal plans:

  1. Snack Pizza

  2. Salmon Patties
  3. Burger Patties
  4. Turkey Patties
  5. Sandwich
  6. Open face as a base for: sloppy joes, or sausage and country gravy.
  7. Just as is, or with butter, or toasted with butter or seasonings (garlic bread, cinnamon and stevia, etc).

Cheese (Dairy Free)

This cheese is an attempt to have a pizza-friendly cheese. I’ve seen a number of recipes online which use similar ingredients (and another I’m awaiting being able to hopefully purchase some ingredients to give it a try as I don’t have on hand what I need to make it) and end up with something you can supposedly slice, grate, shred, melt, or other wise use a cheese, but which aren’t made with cow or other bovine milk and are available to those on any number of diets (vegan, paleo, gluten free, dairy free, whole 30, keto, low carb, diabetic, for example)

INGREDIENTS:

  • 1 Can Full Fat Coconut milk
  • 3 TBSP Unflavored Gelatin powder
  • 2 TBSP Coconut Flour
  • 1 TBSP Nutritional Yeast
  • 1 tsp salt
  • OPTIONAL: add a pinch (to taste) of Thyme and Onion Powder. NOTE: this helps especially if you dislike the nutritional yeast flavor! Other flavor enhancing options? Try a bit of mustard powder, “Unami” seasoning, a bit of liquid from canned olives, and/or sauerkraut juice.

INSTRUCTIONS:

  1. Locate the bowl you are going to use, when you’ve finished the process, to “mold (or shape)” the cheese into the shape you desire. Some ideas include a round, glass bowl, or perhaps a mini “loaf” pan for cracker sized slices. I’m planning on using this for shredding so the size and shape do not matter. But you will need the bowl handy when the time is right. Set it next to the stove top in easy reach.
  2. Measure all the ingredients. No need to mix first. Just place them into a medium size pan, as you measure the correct amount of each ingredient, adding them in the order listed above directly into your sauce pan. It should look more or less like this:

  3. Place the pan over medium heat while you are stirring to mix the ingredients together. NOTE: the consistency of the mixture, before cooking, is roughly like fat-head dough. In fact it is so much like fat head dough it made me wonder if I can do something similar to make a vegan fat-head dough. Anyway, back to our cheese recipe at hand, once the mixture is fully stirred, continue stirring while you turn up the heat to medium or medium-high. Keep stirring.

  4. Stir and heat. You are looking for that mixture to reach a full “boil” and you want to boil the mixture for a minimum of 3 minutes. Once you’ve hit the 3 minute mark, time wise (and I do suggest timing it), dump it quickly into your awaiting bowl which is going to serve as the shape mold for the resulting vegan cheese.
  5. Now cover the cheese.
  6. Place in the fridge. As it cools your vegan cheese will firm up and will become a texture you can slice and you’ll also be able to shred it to use it on pizza, etc. or in recipes.

TIPS:

  • FLAVOR: Experiment with adding optional depth of flavor with these suggested trials: add a pinch to taste of one or more of the following spices/flavorings: Thyme, Onion Powder, mustard powder, “Unami” seasoning, a bit of liquid from canned olives, or a bit of sauerkraut juice.
  • COLOR: This “cheese” is a mozzarella style cheese. However, you can play around a bit with this and get different color cheeses. Who says cheese has to be white or whitish? Other things to try? Annatto Oil (warm for a few minutes 1.5 TBSP of annatto seeds in 1/4 cup quality oil until the spice extrudes into the oil. Store and use. P.S. Annatto is the normal food-safe colorant in cheddar cheeses.) Turmeric. Mustard Powder. Or something creative like beet juice! or Spinach! Who says just because milk is white cheese has to be? It tastes the same, hm?
  • TEXTURE: Need a smoother result? Use an immersion blender to blend everything instead of a whisk, while stirring and cooking. I found this texture to be okay as is!
  • SHAPE: Play around with the “molds” you use. There are, for example, long barrel shaped silicone ice cube makers, made especially for making ice for water bottles. These may be fun to put this mozzarella like cheese into and mold into a string-cheese style shaped snack cheese.

RESULTS:

  • BATCH SIZE: The yield on this is okay. It is neither expensive to do nor does it make too much to use in a reasonable time frame.
  • FREEZER FRIENDLY: I will test (and report later) on freeze capability (both as is, and shredded) to see how it works for food prep and storage.
  • PIZZA: To use this recipe to make pizza (snack, or larger) simply thaw some of the faux tomato sauce we made previously, spread over a the dinner roll recipe I made last week, a low-carb  gluten-free tortilla, or cassava crust recipe made up. Then add your favorite toppings and shred this cheese atop. Bake as you normally would. This cheese will melt and turn back to a more solid shape when cooled.
  • SNACK: To snack, use the cheese as is. Remember to play around with the flavorings and molds to achieve the desired shapes and taste you prefer. If you happen to have a mini loaf pan, that size is perfect for slicing onto crackers. I happened to find a mini-loaf pan for $0.25 at a thrift store! Cannot beat that for a cheese mold!
  • FREEZER? (testing this–will report soon)
  • FUTURE: I have a few more vegan cheeses I’m going to try over time.

This cheese sets up well, was super easy to remove from the glass dish (it came out whole), and shreds easily with my normal cheese shredder. The shredder was also easy to clean up afterwards.  The shredded cheese melted nicely. The cheese sliced tasted okay and the texture was ok too. 

Breakfast Cookie

This can be rolled, shaped, or even baked as bars.

INGREDIENTS:

  • 1/3 cup hemp seeds.
  • 1/2 cup shredded coconut (unsweetened)
  • 3 eggs (for egg-free use 3 TBSP arrowroot in 9 TBSP water)
  • 1/4 cup coconut flour
  • 1/4 cup coconut oil (melted, cooled)
  • 2 tsp pumpkin pie spice
  • dash of salt
  • 1/4 brown sugar substitute
  • 1/3 cup add in (options include chopped nuts, such as walnuts or macadamia; chopped chocolate chunks, crainraisins, raisins, chopped fruit)

METHOD:

  1. Preheat oven to 350.
  2. Line a baking sheet. Set it aside.
  3. Mix together coconut oil and eggs.
  4. Add dry ingredients. Mix well. Allow dough to rest 10 minutes.
  5. Shape into cookie shapes. Makes 12-14 cookies.
  6. Bake for 15 minutes.

I have made this recipe several times with lots of different options. The only note I would make is if you make a stir-in optional choice which is more dry, or your coconut ingredients are more dry than other times, you may need to add a dash of coconut milk or water before shaping your cookies. If you make them as bars, it is so much quicker, but then you have to play around a bit with the time to bake them.

Granola Bars (Hemp Seeds)

Want a simple, yet satisfying snack or grab-and-go breakfast idea? Then here is the recipe for you.

INGREDIENTS:

  • 1 Cup Hemp Seeds
  • 1 Cup Pumpkin Seeds
  • 2 TBSP Chia Seeds (if the texture of chia bothers you, consider grinding these in a coffee or spice grinder)
  • 1 Cup Unsweetened Coconut Flakes
  • 4 TBSP Coconut Oil (or butter)
  • 1 Cup Sunflower Seed Butter (or other nut or seed butter)
  • 1 Cup Walnuts (or any combination of nuts equaling one cup measurement)
  • 8 Packs Sweetleaf Stevia
  • 1 tsp cinnamon

METHOD:

  1. In a bowl, mix together all ingredients. Blend together well.
  2. Press mixture evenly into an 8×8 silicone pan or a lined with parchment paper pan.
  3. Place in freezer.
  4. Once frozen, take bars out of the freezer. Remove the granola block from the silicone pan. Cut in half, forming two portions. Continue cutting each portion in half to form 16 granola bars of equal size.

NOTES:

  • You can eat these straight out of the freezer. They do not freeze “hard” so they are eatable. I wouldn’t even bother keeping them in the fridge. Simple package them into an air tight container and store them, well labeled, in the freezer.
  • There is a LOT of flexibility in this recipe. Potential add ins can switch up the flavor (and the carb count). Try some different combinations. Some things to try: Pistachio nut-butter; macadamia nuts with cranraisins; walnuts with raisins; a stir in of chopped dark chocolate or coating the outside with melted chocolate along one edge.

Macaroon Bake

This simple to make sweet treat is easy to make, comes together in minutes, and combines macaroons with a nutty graham -cracker crust substitute. Bonus: Easy clean up!

INGREDIENTS:

  • 1 package unsweetened coconut
  • 1 package JUSTegg
  • 1 splash cream de cocoa
  • sugar-free chocolate bits
  • pecan meal
  • room temp stick of butter
  • Swerve brown sugar
  • Swerve granular

METHOD:

  1. In a 9x9Pan, spread pecan meal to cover bottom of pan.
  2. Top pecan meal with a layer of Swerve brown sugar.
  3. Stir to combine.
  4. Add softened butter to the pecan/brown Swerve mixture. Mix well to combine. Spread out evenly over bottom of 9×9 pan.
  5. Now, mix a splash of cream de cocoa over the opened package of unsweetened coconut, add a bit of Swerve granular, and JUSTegg. Stir to combine. Spread in an even layer over prepared pecan crust.
  6. Top, if desired, with unsweetened (or stevia sweetened) chocolate bits.
  7. Bake 350 until fragrant and edges of coconut are just browning.
  8. Cool. Cut in to bars. Enjoy.
  9. Store left overs in bite-size pieces in fridge or freezer to thaw and enjoy later.

This recipe is my own creation mocking “graham cracker crust” and macaroon cookies but making them with egg-free and sugar-free ingredients.

RUM Balls

Truffles, Balls, Bites or what ever your preference is for the name of this keto-friendly, lower carb, treat–it spells delicious! This small-batch will last (one serving at a time) throughout a period of time, depending on how frequently you want a “bite” after a meal, but it is perfect for finishing those meals where you simply want one sweet/chocolate flavored bite. (See notes below for dairy-free and vegan options)

YIELD: 24 Rum Balls (about .5 carbs per rum ball)

INGREDIENTS:

  • 4 TBSP Hersey’s Special Dark Cocoa Power
  • 4 TBSP melted butter (or vegan butter, or coconut oil for dairy free)
  • 4 TBSP Sweetener of choice (or to taste)
  • 4 TBSP pecan flour (or grind your own)
  • 3/4 Cup desiccated coconut (unsweetened, or grind your own from unsweetened regular coconut in your blender or small batches in your coffee or spice grinder)
  • 4 TBSP Rum
  • dash of heavy whipping cream (or unsweetened coconut milk, or boiling water) if needed
  • something for rolling (more desiccated coconut, some cocoa powder, or pecans, or any other favorite option. this is optional)
  • Cinnamon (dash-optional)

METHOD:

  1. Starting with a clean work surface to work, assemble all of your ingredients and a bowl. Begin by measuring desiccated coconut into your bowl. NOTE: If you do not have desiccated coconut, you can take small batches of regular unsweetened coconut flakes and process them to smaller size (but not as fine as coconut flour) for use in this recipe.
  2. Carefully measure the rum into your bowl and stir to saturate the desiccated coconut with the Rum. Stir well.
  3. Add all dry ingredients to your bowl.
  4. Add melted fat. NOTE: you have some options here, depending on your dietary needs. You can pick butter or coconut oil (or vegan butter if you are making the dairy-free version) but it should be a healthy fat which is a bit solid at typical room temperature to help hold these rum balls together.
  5. (OPTIONAL) You can add a pinch of cinnamon if you would like. Alternatively, as coconut products vary in how quickly they absorb moisture, you may find your batch (even using the same ingredients) turns out dryer or more moist one time verses another. If you need more moisture to hold these together enough to roll, add a drop or two at a time, and stir before adding more one of the following options: HWC (Heavy Whipping Cream), Coconut Milk, or Boiling Water (it is amazing hat it does when combined with cocoa powder!)
  6. Take a heaping teaspoon of dough and roll in your hand, placing on a piece of parchment paper in your storage dish. NOTE: If cocoa powder bothers your sense of touch, use food-safe gloves or a bit of coconut oil on your hands first before rolling. These are a tiny bit messy! (OPTIONAL) You can briefly roll these in a topping before placing in the fridge. Possible options to try: crushed pecans, crushed pistachios, cocoa powder or even more desiccated coconut.
  7. Cover in air-tight container. Refrigerate.

TIPS:

  • You can vary these a lot. Instead of Rum, try a stiffly-brewed espresso or other coffee, add peppermint extract or creme de menthe liqueur. I think I will also try a batch of these, soon, with a drop or two for the flavoring of YoungLiving Orange or Citrus vitality as yet another option.
  • Instead of Pecans try another nut such as peanuts, hazelnut or pistachio.
  • If you purchase and eat nuts, of any kind, on a normal basis this recipe is a GREAT use for that powdery bit of left over nuts at the bottom of the container of nuts.
  • Swerve granular does not work in this recipe. Use the confection style sugar substitute or grind your own.

Observations:

I was somewhat disappointed with the “rum” flavor not being strong enough, over time, especially when compared to traditional Rum Balls. Whereas these were very strong (perhaps even too strong) in Rum flavor which overpowered the chocolate when they were first made, but then after they spent a few days in the fridge they mellowed so much the rum disappeared into the chocolate and coconut flavors. And frankly, if the rum flavor isn’t there, why bother with the extra calories of the rum–especially when there are SO many other flavors to try. However, having said that, this recipe is a worthy recipe to make a treat for those times when you want a bit of something sweet.

Keto Fudgsicles

These keto-friendly, low carb, frozen treats mock a classic but without all of the added sugar. Using full fat coconut milk provides a lovely texture throughout the frozen treat. These are quick and simple to make.

Equipment:

  • Freezer (space)
  • Popsicles or Ice Pop molds
  • Blender

Ingredients:

  • Coconut Milk (1 can, full fat)
  • Cocoa Powder (3 Tablespoons)
  • Erythrtiol (1 Tablespoon)
  • Kal Stevia (2 Kal mini scoops)

Instructions:

  1. Measure all of the ingredients into a blender.
  2. Blend.
  3. Taste for sweetness. Add more sweetener (or less) to taste.
  4. Pour into molds.
  5. Freeze.

NOTES: These don’t freeze so hard, like some low-carb ice-creams or frozen treats that you cannot enjoy them. The texture is just right.

Try add ins such as peppermint flavoring, or cocoa nibs, or tangerine flavoring.

If you use a can of full-fat coconut milk, blend it, you will have “whipped” coconut and if you distribute it equally among the pops before freezing, you’ll get these creamy sections along side the fudge pops, as seen here. Delicious!

Crispy Fries (not potatoes)

If you are eating AIP, Nighshade-free, or even Keto / low carb, from time to time you may be craving a crispy, but faux, “french fry” like side dish or snack. These are worth of a snack on their own and taste surprisingly great! They would make a nice addition to a Charcuterie Board as a “dipper” with appropriate dip(s).

EQUIPMENT LIST:

  • Kitchen scale with gram measurement units.
  • Glass bowl.
  • Cast Iron fry pan.
  • Frying oil.
  • Tablespoon, half tablespoon and teaspoon measuring spoons.
  • 1/3 cup measuring cup.
  • Serving tongs.
  • Sharp Knife

INGREDIENTS:

  • Organic Coconut Flour (50 grams)
  • Parmesan Cheese (1/3 cup freshly grated)
  • Xanthan Gum (3 teaspoons) [Healthline Article, “What is Xanthan Gum” with science-based evidence]
  • Boiling Water (7 1/2 TBSP)
  • (Oil for frying and salt to taste after removing from oil)

DIRECTIONS:

  1. Begin with a medium size glass bowl. [See Tip below]
  2. Zero your kitchen scale for the bowl you are using and and measure exactly 50 grams of coconut flour into the bowl. [See Tip below]
  3. Measure the parmesan cheese and xanthan gum into the bowl. [See Tip below]
  4. Mix well to combine. [See Tip below]
  5. Measure and pour over these dry ingredients 7 and a half Tablespoons of boiling water. [See Tip below]
  6. Mix well to incorporate. As you are mixing, allow this to form into dough ball in the bowl.
  7. Cover bowl. Let dough ball rest for 15 minutes.
  8. Roll dough out to a flat, even consistency.
  9. Cut flattened dough into fry shapes.
  10. Pan fry in hot oil over medium heat until crispy, turning as needed.

NOTES:

While these were cooking, they didn’t really smell like anything interesting. THEN, all of a sudden, they started to smell like french fries cooking. Shortly after that, they crisped up and became worthy of eating.

Salted, these tasted most like fast-food style deep-fried hash browns to me. I tried salting the dough, and it didn’t make a difference what so ever in taste. So that’s not necessary. Just salt to taste once you’ve removed them from the oil.

I cut my “faux fries” to the length that fits in my stainless steel tongs when open. So that I could “slide” the next batch into the oil off the tong, turn with the tong, and remove with the tong.

Some of my dough broke while scooping it up with the tongs into the oil (thus the reason for developing the “slide off the tong” method above. I had the idea after tasting the first batch of faux fries to form the bits of broken off dough into a tater-tot (or donut hole) shaped form at fry it. This shape experiment also turned out delicious.

I believe this dough could be used to make a hash-brown like side dish and will try/photograph that in the near future. Based on the flavor I’m also going to trial cutting these into O’Brien Style potatoes and frying them in a pan like potatoes.

TIPS:

  • Don’t use a plastic mixing bowl. Xanthan gum is super sticky. You will be sorry if you use plastic.
  • For the same reason as above, you may want to wear gloves if the feeling/sensation of xanthan gum bothers your skin.
  • Use the full amount of xanthan gum. I was slightly hesitant to use 3 teaspoons, it seemed too much for the dough and I didn’t want it “too gummy” but without the 3 teaspoons you will experience dough breakage and the shape will not hold together.
  • Use boiling water. Anything less than boiling water and the dough ball doesn’t really stick together.
  • Cover the dough ball. It helps hold the moisture in for the gum and coconut flour to absorb it correctly to form the dough ball.
  • Don’t use the dry powdered parmesan cheese. It doesn’t work. You need the freshly grated type.
  • These are good fried in any oil but the oil may effect the taste. I happened to have strained oil left frying over from Onion Rings which tasted great!

SOURCE: https://www.youtube.com/watch?v=BisczN8IFSE
I didn’t use olive oil or the same method of cooking but adapted this recipe trial from a pinterest pin of this video.