Category Archives: Onion

Barbecue Sauce (Nightshade Free)

I’ve seen a number of people talking about making this recipe and even including screen shots of having taken it off various websites, including facebook private groups and pinterest. So I’m not 100% certain where this recipe started out, or whose recipe it originally was; however, I’ve adapted for different allergens the basic recipe I found online to give this one a trial.

INGREDIENTS:

INSTRUCTIONS:

  1. Add all of the above ingredients into a sauce pan which is placed over medium heat.
  2. Bring to a boil.
  3. Cook for about 30 minutes or until the volume of this mixture is reduced to about half the volume you started out with.
  4. The rhubarb should be very soft. If not, cook it a bit longer until it is.
  5. Blend with an immersion blender until smooth.
  6. Use right away, or store in an air-tight container in the fridge for use as desired.
  7. Enjoy!

NOTE: If you use pre-chopped, washed, and frozen rhubarb, it may take longer to get to the soft stage, or not, since its already been blanched before freezing. I didn’t bother to thaw my frozen rhubarb first. Just cooked it to the appropriate “softness” stage to blend into this sauce.

Yield: Approximately 2 cups

Result: This is worth the effort to tweak to your individual tastes.

Turkey Nuggets (GF, Egg-Free)

Recently, I re-visited a recipe for turkey nuggets I’ve made many times before. I trialed a few tweaks and they all turned out great!

Original Blog Post and Recipe: https://collectedgoodies.wordpress.com/2023/02/21/turkey-nuggets/

Trials:

  1. I used this same “base” recipe to make one pound of ground turkey into turkey nuggets just as the recipe calls for; however, this time I trialed 1 chia egg [made by measuring out 3 TBSP of water, then adding 1 TBSP whole chia seeds to a spice or coffee grinder and blending the seeds to form a flour of sorts, then adding the chia flour to the water, stir well to combine everything completely, and then allow this mixture to rest a moment for the “gel” to form fully before using it as the binder in the Turkey Nugget recipe]. These turned out excellent!
  2. I used the “chia egg” described above in another 1 pound batch, this time adding 1 tsp of freshly ground black pepper to the meat mixture, as well as 1/4 tsp called for in the breading. These turned out fabulous. They had some heat. While they aren’t “buffalo” by any means, if you or your loved one is nightshade free and able to handle black pepper, this is a great option and is very flavorful.
  3. The next batch, I added celery salt to both the meat (1 tsp) mixture before shaping into nuggets, and to the breading mixture (1/4 tsp) without adjusting the Real Salt already in both. These also turned out tasting GREAT. For my taste buds I like the celery salt version better than the regular version.
  4. I tried a batch just exactly like #3 above, only after mixing the meat mixture, shaping it into nuggets and breading it, as outlined in #3 above, for this trial I also sprinkled the sprinkle cheese atop and “tapped” it in before baking.
  5. I made #3 above, but didn’t have enough coconut flour to make up another batch of “breading”. I did have about 1/2 the volume which was needed to bread this last batch of the left over breading from the trials outlined above. To this 1/2 batch of breading I added the sprinkle cheese I had made up already. I used this as the breading and it is FABULOUS too. They are all very different flavors but all are nice!

If you try them, be sure to mention which is your favorite in the comments below.

Now I just have to work on an excellent BBQ sauce or dairy-free ranch dressing to go along with these too. One friend recommended making a cranberry sauce dip

Yield: 1.5 to 2 gallon bags frozen nuggets

YIELD: approximately 120 nuggets or approximately one-and-a-half gallons, frozen, nuggets.

BAKE TIME: approximately 15-25 minutes, then flip, then cook another 15-25  minutes.

Breakfast Sausage Patties (Turkey)

This recipe, while super easy to make, and fabulous in its texture, is nothing special. It left me less than impressed. It may be worthy of tweaking, or I may find another recipe which is better. Nevertheless, recording I recently made it, how I made it, so I don’t duplicate efforts.

INGREDIENTS:

INSTRUCTIONS:

  1. Assemble all of the ingredients.
  2. In a bowl, combine all of the spices and mix well.
  3. Drain any blood from meat package, and combine meat with seasonings in the bowl.
  4. Divide into 6 portions.
  5. Cook on a griddle pan, a few minutes each side until the edges are done and no longer pink, then flipping and cooking the second side for the same time on the additional size.
  6. Drain off blood and grease while cooking. A serving size is one patty.

TIPS:

  • The fennel seeds, whole, in this recipe seemed a bit too sparse to taste throughout. If I made this recipe again, I would either increase the amount of fennel, or crush it or grind it, before adding to the recipe.
    • For my taste buds, the maple syrup was too sweet in this recipe and not needed. If I make this again, I’d leave it out.
    • The salt/pepper taste was too mild. This is what makes the sausage, sausage. If I made this recipe again, I would increase both.
    • This recipe could benefit from increasing the spices ratio to meat.
    • This recipe works well for “breakfast sandwiches” or for things like faux fried potatoes (cooked up with onions, green cactus, turnips and sausage; with or without kale or spinach tossed in)
    • While I did not attempt to freeze this recipe, it appears to be something which could easily freeze/thaw quite well without any issues.
    • It cooks up super nice! It is so easy. It holds together well.

Lemon Poppy-Seed Dressing (Vegan)

Easy. Quick. Tasty. Basic go-to recipe which you can rely on over and over again.

INGREDIENTS:

PROCESS:

  1. Gather blender, measuring equipment, a clean bottle for the final salad dressing, and the other food ingredients.
  2. Put all ingredients, except the reserved poppy seeds, into the blender.
  3. Blend ingredients until mixed together well. My mixture turned red! Wow, hm? Pretty pink-red color. Taste and see if you need to adjust any of the spices before continuing.
  4. Gently stir in the Poppy Seeds.
  5. Use right away, or store in fridge in an air-tight container. Enjoy within the week as this recipe has no preservatives. The flavors mature best overnight.

YIELD:

This recipe fits perfectly in a “bullet blender” style blender and refills a repurposed glass salad dressing bottle perfectly. As it is super flavorful, you don’t need much to flavor an entire salad or a veggie plate.

NOTES:

  • The olive oil I used is all natural, so when you start to make your salad, set out this dressing to allow it to return to liquid state as the quality olive oil will solidify in the fridge.
  • For me, 1/2 cup of lemon juice was about 3 organic lemons.
  • Wash and roll the lemons prior to juicing them. Rolling them under the palm of your hand releases more juice. Washing them means you can save the peels for: 1. freezing and using with your zester as needed in recipes 2. cutting and prepping for candied citrus peels 3. dehydrating to use in recipes like Lemon Pepper Seasoning.
  • If you are making this recipe sugar-free, try using simple syrup made with your favorite sugar-free sweetener.
  • 1/4 cup of minced onions was way too much for me. I think next time I will go just shy of 1/4 cup minced onion.
  • This pairs nicely with a crunchy salad, spinach, or even as a veggie dip if you catch it at the right “thickness” from the fridge.
  • For the convenience of those living in Texas, and myself, I’ve linked to the products used in making this recipe so I can more easily re-order them when I run out and want to make this recipe again. It is also available on Carb Manager for tracking/nutritional info.

Savory Crackers

This recipe is a trial of turning various recipes I’ve viewed online into an allergen-friendly recipe based on the allergens I’m making meals and meal plans around based on the folks in my life who have various allergies and sensitivities.

INGREDIENTS:

  • 1 cup freshly GROUND sunflower seeds.
  • 4 tsp nutritional yeast
  • 2 tsp psyllium husk powder
  • 1.5 tsp italian seasoning powder
  • 1 tsp salt
  • 1 tsp garlic powder
  • 1 tsp onion powder
  • 1/4 cup boiling filtered water

METHOD:

  1. Begin by measuring all of the dry ingredients into an appropriate sized bowl.
  2. Mix together dry ingredients well.
  3. Add boiling water.
  4. Mix together well to incorporate all dry ingredients into water. Press together until it forms into a dough ball (it may be a bit sticky–that’s okay)
  5. Allow “dough” to rest for a few minutes.
  6. Place dough ball on baking tray between either two pieces of parchment paper or two silicone baking mats. Roll out thin. Now you can leave it whole and bake it that way (watch closely this is going to require longer baking by a few minutes), score it to break easily, or cut it into bite sized crackers. Any method works great depending on how you are going to use it later.
  7. Bake until desired done in a 350 F degree toaster oven. Cooking time may vary on each batch.

NOTES:

  • Add color: parsley flakes, mustard or turmeric powder, beet or spinach water (left over from cooking and draining a colored veg) or never mind the fact they look ugly–they taste fabulous! With the fresh nutritional yeast combined with the other herbs and spices this tastes like Italian Parmesan something–not quite the texture of breadsticks but not bad either.
  • Watch the salt. It can taste too salty. So adjust to your likely and purpose. This is okay as is, but I would tweak the salt down (or leave it out all together) for some uses.
  • Serving suggestions: with dip: Don’t pre-cut or score the dough prior to baking. Instead bread into dippers and serve on your snack boards with dip. as a chip: simply enjoy as you would chips or crackers on the side with favorite go-alongs or alone, as is. as a snack: spread with jam, preserves, butter, a compound butter, or top with dairy-free cheese or fish/salmon/sardine/ or plant-based “spreads” atop such as pesto or olive tapenade.

Flat Bread (Dairy Free, Gluten Free, Grain Free)

This versatile side dish is worthy of eating on its own, as the base to scoop up your favorite gravy or jam, to make a sandwich, or any other naan-bread like use you can think of! It can be made unleavened without sacrificing its texture or flavor, simply by leaving out the “baking powder” or using a baking powder replacement. There are a number of tested options for oil too–ranging from coconut oil, ghee, olive oil, melted butter, or even a veggie or fruit puree. All work well! Give it a try.

YIELD: 6 Flatbread pieces per batch
This recipe takes some time to make, but is worth it. Even if you plan on making more than 6 flatbread pieces, make them one batch of dough at a time.

INGREDIENTS:

  • 2/3 Cup Coconut Flour (I used HEB Organics)
  • 2 TBS psyllium husk powder
  • Optional: 1 tsp Baking Powder
  • 2 TBS Olive Oil (or use one of the following instead of the olive oil: Ghee, coconut oil, melted butter or a puree)
  • 1/4 tsp salt
  • About 1 Cup Boiling Water

METHOD:

this recipe, once the dough is formed and rested, is very much like making “pancakes” –> you will be cooking the dough rolled or patted as thinly as you desire until it is cooked, then flipping it and cooking it on the other side too

  1. Begin by assembling your ingredients.
  2. Mix together the dry ingredients first.
  3. Mix in the oil to incorporate, then slowly add the boiling water. Depending on the brand, and freshness of your coconut flour this may take more or less than 1 cup of water to form the dough. Mix until  dough forms. (The texture is very much like “mashed potatoes”)
  4. Allow the dough to rest 10 minutes, or until cool enough to handle. The dough needs this resting period to hold together, since it is not made with gluten.
  5. Divide the dough evenly into 6 dough balls.
  6. Roll the dough balls out, one at time, or pat with your hands, depending on the desired thickness.
  7. Cook the bread, dry style, in a heated cast iron pan or griddle. Allow the first side to fully cook, before flipping to cook the second side.

    OPTIONAL: Have melted butter (or other oil) available if desired to which you can add garlic, parsley, or other spices. Brush surface of bread with this herb oil (or serve with dipping sauce) after it is finished cooking and just before serving.

TIPS:
– Other toppings include the option to have no topping, just enjoy the bread as it is, cinnamon stevia, green onions, jam, preservatives, lunch meat, cheese spread, fish spread (such as tuna or salmon salad), parsley, garlic salt, sesame seeds (with or without the oil being toasted sesame oil) or just about any other topping you can think of.
– NOTE: This bread gets more and more MOIST after the first day. It works best to make a batch and use it up, rather than having it sit around too long.
– Depending on the thickness, you can roll this as thin as a tortilla, although those are hard to turn, or patting them to a thickness like old-fashioned potato pancakes and they taste a bit like them, texture wise, too. The potato cake, or veggie nuggets, style makes a nice side dish.

Another recipe I’m going to try too, which is similar but uses a few different ingredients is: https://myheartbeets.com/coconut-flour-naan/

Cheesy “Faux-tatoes”

One of the most requested recipes I’ve made and others have enjoyed is Cheesy Potatoes. But not everyone can eat nightshades/potatoes or high-carb side dishes such as the original recipe for Cheesy Potatoes. Solution? Cheesy FROZEN Cauliflower Rice Faux-Tatoes.

Why use frozen cauliflower? Many brands (or fresh-made) rice cauliflower have a lot of flavor from the veggie. Whereas the frozen cauliflower is rather bland, by comparison, lending its use as a substitute for hash browns without the traditional cauliflower flavor.

What’s different? Frozen cauliflower is super moist compared to frozen potatoes. You’ll need to thaw and pat dry the cauliflower rice before using.

INGREDIENTS:

  • 1 Pound Frozen Cauliflower Rice (plain)
  • Pepper
  • Celery Salt
  • Shredded cheese
  • Minced Onion
  • 1/2 stick of butter

METHOD:

  1. Thaw the riced cauliflower.
  2. Pat the cauliflower dry with a clean kitchen towel.
  3. Place mixture in bowl.
  4. Mince onion and stir into cauliflower rice mixture.
  5. Add celery salt and pepper. If you would like, add fresh or dried parsley. It looks lovely and adds nutritive value too. Stir well to incorporate.
  6. Mix 1/2 of the cheese into the mixture. Smooth out in 9×9 (or 8×8) baking dish. Top with the remaining 1/2 of cheese.
  7. Bake at 375 until cheese is golden brown.

NOTES:

This was still too moist. I had friends say it tastes exactly like the cheese potatoes I make. However, I wasn’t satisfied with the moisture content. I left the condensed soup out, to help keep nightshades and carbs out of this recipe (and make it gluten free too) and also because I thought it would be too moist with condensed soup included. It turned out to be a bit moist/runny even with removing the soup. It could use another spice or two, which can compliment your main dish. Such as “Old Bay” if you are enjoying fish, garlic with just about any main, or any other favorite spice(s) and/or blend(s) of choice. Next time too, because of the moisture, I think I will try using dried minced onions from the spice aisle instead of freshly minced onion. This recipe can easily be doubled and baked in a 9×13 pan. Could be eaten as is, or enjoyed with a dollop of sour cream and a snip of chives along side.

Quinoa Salad

Great middle-eastern style chopped salad. The tinnier you chop the herbs and onions, the better the result. It is super nice once its marinaded. Great salad to make ahead and set out when guests arrive.

INGREDIENTS:

  • 1 cup quinoa, dry (yields 4 cups cooked)
  • ½ cup chopped parsley
  • ¼ cup chopped mint
  • ⅔ cup pomegranate seeds (1 pomegranate or frozen, thawed)
  • ½ small red onion, finely chopped
  • Juice of 1 lemon (approx 2 tbsp)
  • Zest of 1 lemon (1 tsp)
  • 2 tbsp extra virgin olive oil
  • ½ tsp garlic powder
  • ½ tsp cumin (optional)
  • sea salt and pepper to taste

METHOD:

  1. Begin by making the quinoa according to the package directions. Alternatively, make this recipe to use up left over plain quinoa. NOTE: If you use left over quinoa, allow it to come to room temperature before stirring in additional ingredients.
  2. While the quinoa is cooking, fluffing, and cooling, wash the mind and the parsley. Allow to dry. Finely minced or use an herb scissors to finely mince the leaves.
  3. Mix together Pomegranate seeds, the minced red onion, with the herbs. Stir into cooled quinoa.
  4. Mix lemon zest, lemon juice, olive oil, garlic powder and cumin together. Pour over salad as a dressing.
  5. Add salt and pepper to taste.
  6. Refrigerate (over night is best).
  7. Serve.

Kale Bake

This casserole is a lower-carb version of a lasagna-like dish, with similar flavors, but unique. This is a great, gluten-free, nightshade-free, recipe to use up things you have on hand and it tastes great. It is lovely paired with a side salad.

INGREDIENTS:

  • 9 x 9 pan
    • White sauce (home made or store bought)
      • Kale (or spinach)
        • One or more cheeses (can be vegan, homemade, or store bought). Suggestions include: Italian cheeses, ricotta, cottage cheese (drained), fresh shaved Parmesan, mozzarella, or Monterrey Jack.
        • Dried Italian Seasoning to taste.
        • Pepperoni (vegan, or turkey based) or sausage (vegan or beef)

METHOD:

Layer, alternating layers, into – 9×9 Pan the following:
– kale pesto white sauce
– Kale
– 1 to 3 Cheeses (ricotta, cottage cheese, fresh shaved Parmesan, mozzarella, Monterrey Jack)
– Italian Seasoning
– (optional crumbled sausage or other favorite protein source)
– repeat layers as needed to fill the pan
Bake 350 for 45 minutes, or until cheese is to your desired brownness.

SAUSAGE (optional):


To make sausage (optional) take 1 lb of your favorite protein source and place it in a bowl. (If you are using canned beans, rinse and drain well before placing in the bowl). Lay down a “bead” (where you can still see the spice and it doesn’t get lost into the moisture of the protein source) of each spice: fennel seeds, pepper, salt to taste (optional-cheese is already salty), celery powder, garlic powder, parsley, dried onion flakes, a pinch of brown sugar, and a pinch of mustard powder. Mix the spices throughout the protein source so it is equally distributed. For raw-meat, cook and cool before placing on pizza or in the lasagna-like kale casserole. If using beans, add enough onion flakes and spices to bind the beans together and you can skip the cooking step for this recipe and use them in bit-sized drops as a protein layer in your casserole dish.

I’ve tried this recipe with an additional ingredient. Read about my trial of adding Palmini Lasagna sheets to this recipe.

Salad Dressing

This salad dressing is versatile, nightshade free, keto/low carb friendly and can be used together with mayo, sour cream, or cream cheese to make fry sauce, veggie dip, or other condiment like substitutions. Can be used as a substitute for cole-slaw dressing.

Ingredients:

  • 4 ounce Pumpkin Baby food (this is 1 “stage one” container)
  • 1/4 to 1/2 cup Swerve granular
  • 1/2 cup fresh EVO
  • 1/4 minced yellow onion
  • 1/4 cup cooked beets, minced
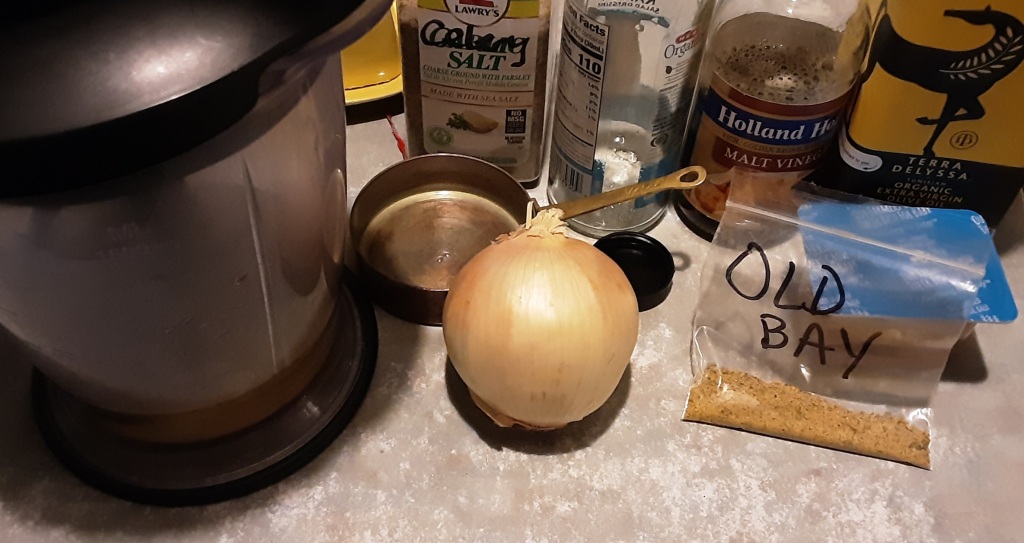
  • 1 1/2 TBSP Old Bay seasoning
  • 1 tsp celery salt
  • 1/4 cup malt vinegar
  • 1 TBSP lemon juice

Method:

Combine all ingredients inside blender until well mixed . Pour into clean salad jar. Refrigerate.

NOTES:

While this recipe, tastes great, it doesn’t “sit” well in the fridge. It begins to break down and needs to be re-blended. It is best used the same day it is created and/or tweaked with the addition of a stabilizer which i will be examining in future editions of this recipe! My planned first trial will be Soy Lecithin, which is used in vegan butter recipes to hold it together.