Category Archives: Substitutes

Palmini Lasagna Noodles (Product Review)


BENEFITS: Lower carb than regular pasta noodles. They can be eaten raw and are quite nice that way. They could be used cut into ribbon shapes in soup.

CONS: Baked they get stringy and chewy, as well as they put a lot of lemon-flavored fluid into the dish.

BEST USE: Fish-based lasagna with white sauce, “hamburger helper” style pan lasagna with these noodles tossed in at the very end of the cooking process so they don’t get over cooked.

MUST: Rinse and drain well before use.

THOUGHTS:

These pasta-substitute noodles are made from palm. They are cut in the shape of lasagna noodles. They are readily available at local grocery stores (at least in my area) or online from the manufacturer or amazon.

Unlike the angel hair Palmini pasta substitute, the lasagna noodles didn’t work for me. When I saw them for sale at the grocery store, I got some to try. I thought immediately of using them to create a lasagna version of my “kale bake”.

The package says to rinse and drain the noodles then use them as you would normally use lasagna noodles. So I did so. I discovered in a 9×9 baking dish, a layer included 8 pieces of Palmini laid four wide, two deep, fit in the pan perfectly.

The result? Yulk! Baked as a new layer into the Kale-Bake recipe I recently posted here (this recipe is my own creation) these noddles get stringy and fibrous; as well they taste like artichoke hearts once baked. Very lemony. So if you enjoy seafood/fish lasagna with a white sauce, go for it! Otherwise, I’d skip this version.

Having said that, however, I’d also be willing to try in the future (if I buy more of these) these noodles roughly chopped up to make a “hamburger helper” style of pan lasagna. To do so I suggest cooking the meat or beans, draining if needed, adding any veggies and sauce to cook those completely, seasoning to taste, and then adding chopped Palmini lasagna noodles which have been rinsed and well drained. Serve as soon as they are hot.

SERVINGS:

One package, as shown above, rinsed and drained had 20 lasagna shaped pieces in it.

SIZE:

I found the only photos of what is inside this package to be a bit misleading or confusing as to side. The rectangle Palmini sheets are about the size of a 2lb block of cheese thinly sliced.

Brioche Buns (Low Carb)

I have two recipes I’ve tried for Brioche Buns. One is conventional (high carb) and the other is low carb. Both are really great recipes. Given some time, I may combine the two methods and come up with my own version, as there are things I like about each version. Normally, when I test out a recipe from the internet (this one I found on Pinterest) I simply list the “source” of the recipe I tried, and modified for various needs, at the bottom of the recipe. This time I’m putting the source right up top because this food blogger has a lot of tips you may want to read thru prior to making this recipe. The source for this recipe is FatKitchen.com

INGREDIENTS:

  • a quality kitchen scale
  • a baking sheet
  • a clean kitchen towel
  • 236 grams 80-degree water
  • 1.5 tsp sugar
  • 2 tsp yeast
  • 100 grams room temperature JUSTeggs
  • 80 grams lupin flour
  • 170 grams vital wheat gluten
  • 38 grams Oat fiber
  • 3.5 TBSP allulose
  • 3.5 grams real salt
  • 2 TBSP room-temp butter
  • (Optional) egg wash, melted butter, everything bagel seasoning or sesame seeds to top the rolls before baking.

METHOD:

  1. Add water , sugar, and yeast to the bowl of your stand mixer. Allow this to begin to bubble to test the yeast.
  2. Meanwhile, in another bowl measure by gram weight and mix together the lupin flour, vital wheat gluten, and oat fiber until combined. Set aside until later.
  3. If your yeast is proofed, then add the dough hook to your stand mixer and slowly add the JUSTeggs on low speed until mixed.
  4. Now add 1/2 of the flour mixture we sat aside above. Let the dough hook in the mixer run on low for 3 minutes. Then add the remaining flour mixture and let the mixer’s dough hook run on low for another 12 minutes. (Great time to clean up and put things away!)
  5. Add the real salt and softened butter. Allow both to mix in well. The dough should not be greasy if the butter is mixed all the way in. Keep mixing longer if the dough feels greasy.
  6. Remove the dough hook from the mixer. Cover your mixing bowl with the dough in it with a clean towel and allow to rest 30 minutes.
  7. Remove dough from bowl. Turn out onto a cutting board. Cut in to 8 equal sized portions.
  8. Shape as desired. Cover.
  9. Allow to double in size (approximately 1.5 hours)
  10. Bake at 375 for 18 minutes.
  11. Allow to cool before cutting.
  12. Enjoy!

Source: https://www.fatkitchen.com/low-carb-brioche-buns/

Thanks Charisse (pronounced ‘sha-reese’) for working out this great base recipe.

Kale Bake

This casserole is a lower-carb version of a lasagna-like dish, with similar flavors, but unique. This is a great, gluten-free, nightshade-free, recipe to use up things you have on hand and it tastes great. It is lovely paired with a side salad.

INGREDIENTS:

  • 9 x 9 pan
    • White sauce (home made or store bought)
      • Kale (or spinach)
        • One or more cheeses (can be vegan, homemade, or store bought). Suggestions include: Italian cheeses, ricotta, cottage cheese (drained), fresh shaved Parmesan, mozzarella, or Monterrey Jack.
        • Dried Italian Seasoning to taste.
        • Pepperoni (vegan, or turkey based) or sausage (vegan or beef)

METHOD:

Layer, alternating layers, into – 9×9 Pan the following:
– kale pesto white sauce
– Kale
– 1 to 3 Cheeses (ricotta, cottage cheese, fresh shaved Parmesan, mozzarella, Monterrey Jack)
– Italian Seasoning
– (optional crumbled sausage or other favorite protein source)
– repeat layers as needed to fill the pan
Bake 350 for 45 minutes, or until cheese is to your desired brownness.

SAUSAGE (optional):


To make sausage (optional) take 1 lb of your favorite protein source and place it in a bowl. (If you are using canned beans, rinse and drain well before placing in the bowl). Lay down a “bead” (where you can still see the spice and it doesn’t get lost into the moisture of the protein source) of each spice: fennel seeds, pepper, salt to taste (optional-cheese is already salty), celery powder, garlic powder, parsley, dried onion flakes, a pinch of brown sugar, and a pinch of mustard powder. Mix the spices throughout the protein source so it is equally distributed. For raw-meat, cook and cool before placing on pizza or in the lasagna-like kale casserole. If using beans, add enough onion flakes and spices to bind the beans together and you can skip the cooking step for this recipe and use them in bit-sized drops as a protein layer in your casserole dish.

I’ve tried this recipe with an additional ingredient. Read about my trial of adding Palmini Lasagna sheets to this recipe.

“Cheese Dip” (dairy free)

INGREDIENTS:

  • 1 TBSP Water
  • 1 TBSP Cornstarch (arrowroot or cassava equivalent)
  • 13.6 Ounce Can Coconut milk
  • 3/4 C Nutritional Yeast
  • 1 1/2 tsp garlic powder
  • 1 1/2 tsp onion powder
  • 1/2 tsp (tumeric)
  • 1/8 tsp cardamom (optional)

DIRECTIONS:

  1. In a small bowl, wisk together water and cassava.
  2. In a sauce pan, over medium heat wisk together, until combined well, theccoconut milk, nutritional yeast, and spices.
  3. Stir in water mixture into sauce pan and continue whisking while heating for 5-10nminutes while your sauce reaches the consistency you want.
  4. Taste. Adjust flavor with added, but optional, salt, pepper, or cumin powder, etc to taste,
  5. Enjoy with your favorite dippers or use as nightshade-free pizza sauce, casserole sauce or as a veggies sauce.

Salad Dressing

This salad dressing is versatile, nightshade free, keto/low carb friendly and can be used together with mayo, sour cream, or cream cheese to make fry sauce, veggie dip, or other condiment like substitutions. Can be used as a substitute for cole-slaw dressing.

Ingredients:

  • 4 ounce Pumpkin Baby food (this is 1 “stage one” container)
  • 1/4 to 1/2 cup Swerve granular
  • 1/2 cup fresh EVO
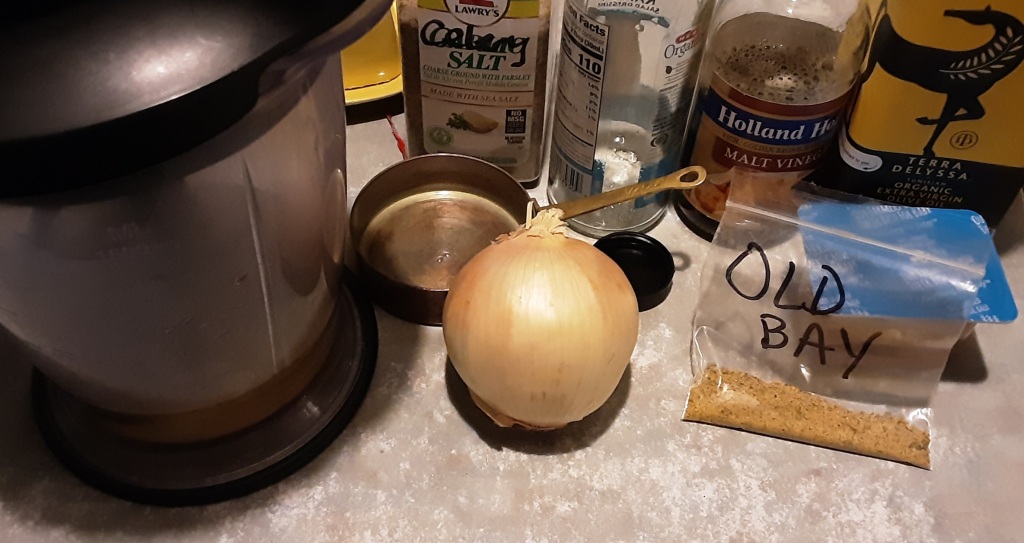
  • 1/4 minced yellow onion
  • 1/4 cup cooked beets, minced
  • 1 1/2 TBSP Old Bay seasoning
  • 1 tsp celery salt
  • 1/4 cup malt vinegar
  • 1 TBSP lemon juice

Method:

Combine all ingredients inside blender until well mixed . Pour into clean salad jar. Refrigerate.

NOTES:

While this recipe, tastes great, it doesn’t “sit” well in the fridge. It begins to break down and needs to be re-blended. It is best used the same day it is created and/or tweaked with the addition of a stabilizer which i will be examining in future editions of this recipe! My planned first trial will be Soy Lecithin, which is used in vegan butter recipes to hold it together.

“Scallops” (Vegan)

This recipe makes a mock “scallops” from pan frying hearts of palm in a seasoning which results in a clean scallops substitute.

In less than 15 minutes, you can enjoy vegan “scallops” as an appetizer, main dish, or a favorite go-to addition to kale or spinach salad(s).

INGREDIENTS:

  • 1 can or jar of Hearts of Palm
  • 1 TBSP Olive Oil (or saute in veggie broth for oil-free)
  • 1/2 tsp minced garlic
  • 1 TBSP lemon juice
  • 1 tsp Old Bay seasoning (link to my DIY recipe)
  • salt and pepper to taste

METHOD:

  1. Begin by draining and rinsing the hearts of palm.
  2. If your container (where I live they are sold either in a jar/brine or in a can) has your hearts of palm whole, then cut into 1/2 inch thick rounds, like scallops are naturally shaped. If your container doesn’t contain whole hearts of palm, not worries–the dish will still be T A S T Y! You can use your pre-cut in the can hearts of palms just as nicely in this recipe.
  3. Add olive oil to your seasoned or non-stick pan over medium heat.
  4. Saute the garlic and hearts of palm, ensuring they are in a single layer.
  5. Cook each side to brown or golden on that side before turning.
  6. Season with a pinch of salt and Old Bay seasoning. (link to recipe to make a nightshade-free version of Old Bay)
Image of Hearts of Palm. Left is already cut, and the right is needing to be cut.

Serving Suggestions:

  • Use in any recipe, as you would scallops.
  • Allow to cool slightly and add to a crispy salad for a nice summer time meal which doesn’t “heat up the kitchen”
  • as a snack
  • in seafood enchiladas
  • as a sandwich or tortilla wrap filling

Seasonings: Old Bay (Nightshade-Free)

This blog post is one in a series of posts on DIY Seasoning Blends.

Nightshade -Free “Old Bay” style spice blend

INGREDIENTS:

  • 2 TBSP ground yellow mustard powder
  • 2 TBSP celery salt (I used homemade, made by grinding whole celery seed and combining with Real Salt)
    • 4 tsp parsley flakes
  • 2 TBSP peppercorn blend (I used HEB Medley)
  • 1 tsp coriander
  • ½ tsp ginger powder
  • ½ tsp turmeric powder
  • ¼ tsp cardamom powder
  • ¼ tsp cinnamon powder
  • ¼ tsp cloves powder
  • ¼ tsp nutmeg powder

METHOD:

If any of your spices are whole, take a moment to grind them. Otherwise, combine and enjoy! This mixture exactly filled an empty spice jar and a bit of extra left over.

NOTES:

  • Tastes great with fish!
  • Use in making salad dressings or as a salad seasoning.
  • Awesome flavor to add to soups and stews. Don’t forget to add a bay leaf or two while cooking.
  • Tastes great as the seasoning added to your “flour” before breading pretty much anything.
  • Also great with wild rice.
  • Source: I adapted this recipe to my own needs and preferences after reading Mindful Jay’s blog post. Thanks Jay!

RECIPES:

A few tried and true recipes using this “Old Bay” seasoning

Coconut Waffles

This recipe was cooked in a Churrwaffle 4-mini waffle maker using 1/8 cup of batter and coconut oil for greasing the waffle maker. Resulting waffles can be enjoyed as is, toasted, or frozen and thawed.

INGREDIENTS:

  • 8 oz cream cheese (vegan: use cashew cream )
  • 8 eggs (vegan: use “just eggs” liquid )
  • 8 TBSP coconut flour
  • 2 tsp baking powder
    • 2 TBSP melted butter (vegan option: use coconut oil)
  • 2 TBSP Sweetener of choice

DIRECTIONS:

  1. Preheat waffle iron .
  2. Combine eggs, cream cheese, and melted butter. Mix well.
  3. Add remaining ingredients to mixture and stir to combined.
  4. Grease heated waffle iron with fat of choice (I used coconut oil)
  5. Add 1/8 cup batter to heated waffle iron per well.
  6. Cook until done to your preference.
  7. Repeat with remaining dough.

TIPS:

  • This recipe makes 24 mini waffles.
  • To use this as bread, omit sweetener.
  • Optional add ins include: Vanilla Extract (1 tsp), cocoa powder (1-2 TBSP); or mini chocolate bits or cocoa nibs. (I made mine without any of these optional ingredients)

FREEZING:

These waffles freeze and thaw well. It doesn’t change their texture too much and make them a great allergen-free convenience food substitute.

To freeze, be sure to cool waffles fully before preparing to freeze or you will have unpleasant ice crystals. If you don’t allow them to fully cool, you will have a lot of condensation which will ruin the texture of these when they thaw. I labeled and then lined a gallon zip lock with a row of waffles, parchment paper, another row of waffles. I then “burped” all the air out of the zip lock and froze them flat. Generally, when I want a frozen item to stay flat, i freeze it atop a tray; later, I remove the tray from the freezer once the item is fully frozen and will keep its shape.

When removing the waffles later to use, this method insures you can remove the exact portion you want. It takes less than 5 minutes, from frozen to eating them, to thaw these in a toaster oven. It takes about 20-30 minutes on the counter top to fully thaw. Perfect if you’re fixing something and want to consume these when finished such as: cooking, showering, doing the laundry, preparing lunch, or doing the dishes, and so on.

TOPPINGS:

  • Enjoy 2 of these as a “bun” for sandwich, breakfast sandwich, grilled cheese, making french toast, a cheese burger, or other sandwich type of snack or meal.
  • Enjoy one or more as is, spread with butter, honey, jam, jelly, or any fruit or nut butter.

My favorite topping is my faux apple butter.

Korean BBQ Sauce

This recipe is adapted to be low-carb and for allergen removal from this Snappy Gourmet article.

INGREDIENTS:

  • Soy Sauce (1 cup, low sodium)
  • Turnip (size of an asian pear; peeled; alternatively use Choyte squash)
  • Swerve-Brown Sugar Substitute (1/2 cup)
  • Malt Vinegar (1 TBSP)
  • Garlic (1 TBSP fresh, minced)
  • Ginger (1 TBSP, fresh, minced)
  • Green Onion (chopped)
  • Sesame Seed Oil (1 tsp)
  • pepper

INSTRUCTIONS:

  1. Measure ingredients.
  2. Dump into blender.
  3. Blend well.
  4. Cook in sauce pan for 5 minutes to thicken to desired thickness.
  5. For my ingredients, I needed to re-blend them after cooking.
  6. Jar.
  7. Refrigerate until using.

USE:

  • On a sandwich or wrap, with or without mixing it with mayo.
  • On meat or beans to flavor.
  • In a stir fry.
  • While cooking meats or beans in the slow cooker or on the grill.

Breakfast Substitute

Note: While cooking this recipe, I discovered a happy substitute for cooked breakfast cereal. A pealed, raw, minced, turnip processed in the blender or food processor but otherwise raw turnip, cooked in butter and then given a healthy covering of maple/brown sugar to form a sort of sauce covering the cooked turnip bits, could easily be a substitute for oatmeal or other such cooked cereals.

Faux Ketchup

an ongoing attempt at finding a suitable substitute for tomato-based ketchup which is low-carb and nightshade-free.

UPDATED TRIAL: collectedgoodies.wordpress.com/2024/06/11/ketchup-nightshade-free/

SEASONINGS:

  • salt
  • pepper
  • allspice
  • celery salt
  • garlic powder
  • oregano
  • sweetener (1 pck Sweet Leaf Stevia, or omit)
  • 1 TBSP malt vinegar

METHOD:

  1. To a blender add 6 ounces of cooked (leftover or canned) beets
  2. Add a pinch of each of the seasonings.
  3. Pulse to puree into a smooth condiment.

OBSERVATIONS:

This recipe turned out “okay” most especially when mixed into an equal amount of mayonnaise and used as a “fry sauce”. However it was too sweet. Next time I will try omitting the stevia package. Also, this cannot be made and used the same time it is made as it needs to marinade a while longer. Going to try it next with carrots and/or a mix of pureed carrots and beets. It is a great way to use up left over beets or carrots.